Shibori is the umbrella term that refers to a variety of Japanese resist dyeing techniques. Many of them can be either incredibly simple or quite intricate, depending on your choices. This is definitely the case with nui shibori, or stitched shibori, which uses a simple running stitch, which is then tightened and bound.
It is possible to do very complicated designs (Jane Callander has a fabulous book of amazing stitched shibori), but I find I often enjoy very simple designs just as much.
Below I will lead you through creating a simple circle shape, which I always find is evocative of a moon or sun, and show how a slight change in stitching leads to an entirely different effect.

The first step is to draw out your design. I traced a dinner plate for my circle, and then marked out grid lines that were 1 cm apart. On one piece I made both vertical and horizontal lines, to create a grid, and on the other, I only made horizontal lines.
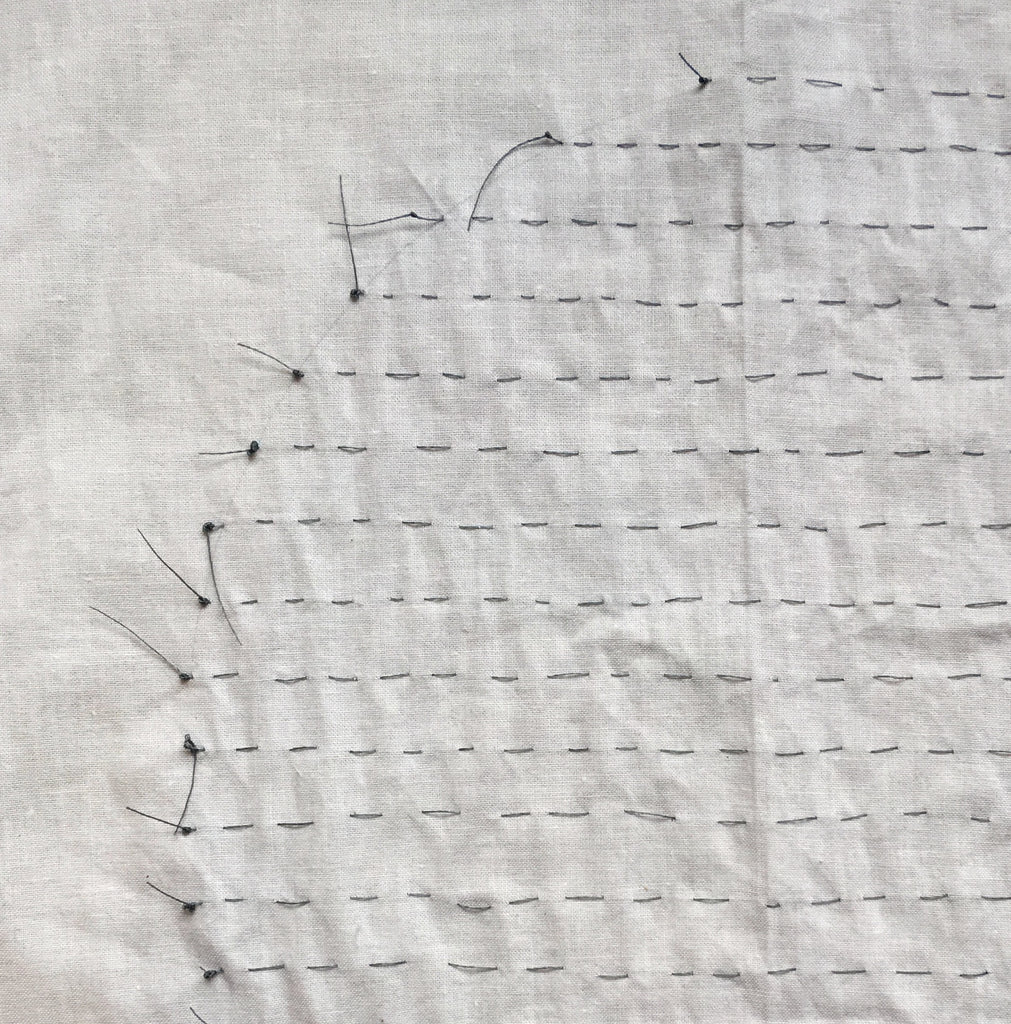
You then use a piece of thread, with a knot at the end, and a simple running stitch. Sew one piece of thread for each line that you marked out, stitching along the line. Don't worry too much about how far apart the stitches are, or if they are even. This will result in the mokume or wood grain effect.
Make sure to use a very strong thread. Regular sewing thread won't do - you need a nylon thread such as upholstery or buttonhole thread, or some kind of monofilament (dental floss will work in a pinch!) The test is to try to break the thread with your hands by pulling. If it snaps, it's not strong enough.

On my second piece, where I had drawn out the full grid, I was purposefully careful that the stitches went in and out at specific spots (above). All the stitches are then exactly 1cm long, on both front and back, and were also spaced 1cm apart.

Once you've stitched all the lines, begin to gather your stitches up. I usually loosely gather the whole thing, and then go in and tighten as I knot one string to the next. How tight you manage to pull and tie the strings will determine how dramatic the difference between the dyed and undyed portions will be. This is why you want to use very strong thread - if not, it will break and your stitching time will have been wasted.

The final piece will be fairly small - much of the fabric will be bound up. You can trim the excess strings, or leave them hanging to help you dangle your piece into the indigo vat.

Now it's time for the dyeing! I used our Indigo Kit and did quite a few dips - around 10, to achieve a nice dark blue. Once your dyeing is complete, it's the fun part! Lightly rinse the piece, then carefully snip the sewing and pull out the threads to reveal your designs. You can properly rinse the piece once the resists are gone.
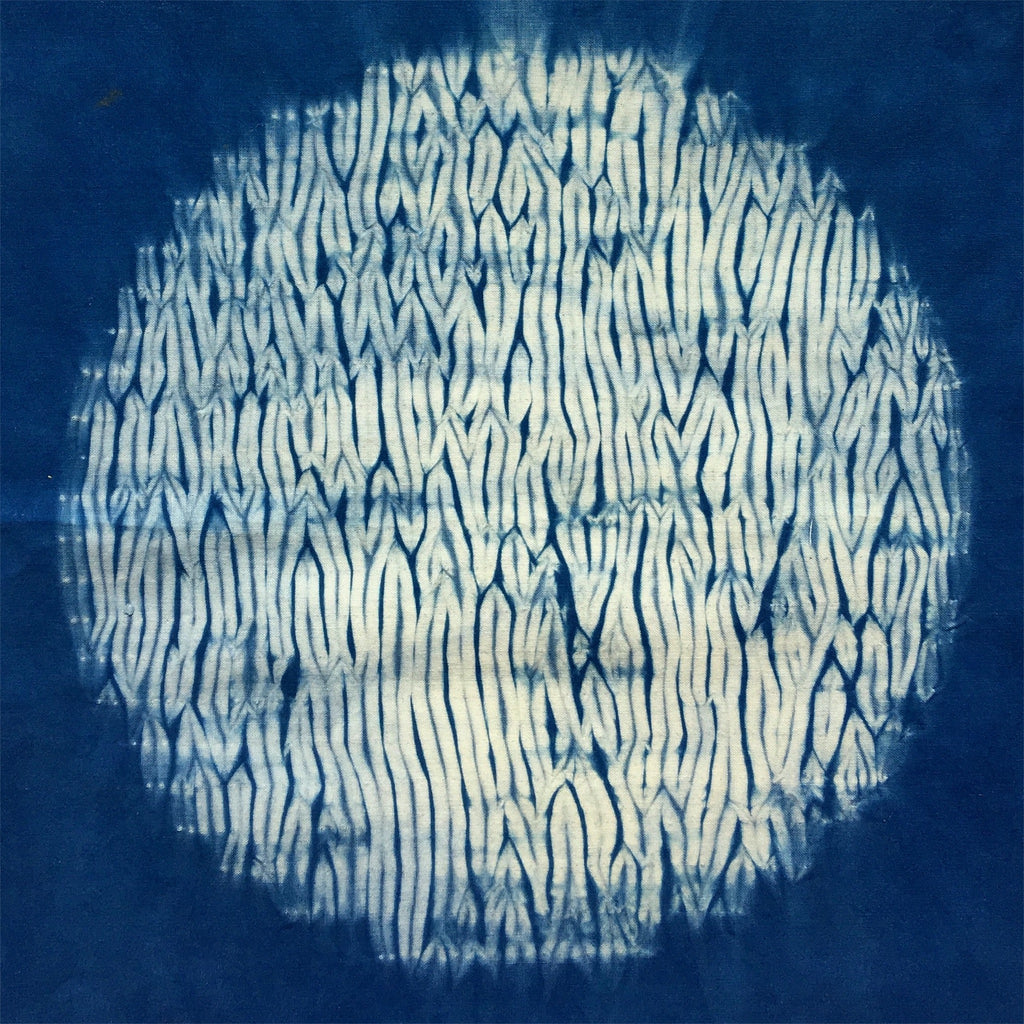
The piece which was stitch more willy nilly, resulted in the beautiful wood grain pattern known as mokume (above), while the piece that was carefully stitched along both the vertical and horizontal axes, resulted in an evenly striped shaped (below). I can't decide which I like more. But they were both very simple to execute.

Leave a comment